Learn how to implement a comprehensive Model Context Protocol (MCP) server using Apache Camel, Spring Boot/ Quarkus, and contract-first development. This implementation demonstrates enterprise-grade patterns with real-time streaming capabilities for AI agent interactions, and integrates directly with Claude Desktop.
This implementation demonstrates how to build a comprehensive MCP server using proven enterprise technologies while maintaining full compliance with the MCP specification. The architecture supports both traditional request/response interactions and real-time streaming, making it ideal for AI agent integration with tools like Claude Desktop.
The Model Context Protocol (MCP) enables AI applications to securely connect to data sources and tools. By implementing an MCP-compliant server with Apache Camel, we can leverage enterprise-grade integration patterns while providing AI agents with reliable, scalable access to order management capabilities.
| Component | Technology | Purpose |
|---|---|---|
| Integration Framework | Apache Camel | Route-based message processing |
| Application Framework | Spring Boot / Quarkus | Dependency injection and auto-configuration |
| HTTP Transport | Netty HTTP Component | High-performance streaming transport |
| API Definition | OpenAPI 3.0 | Contract-first development |
| Protocol | JSON-RPC 2.0 | MCP standard compliance |
| Real-time Updates | Server-Sent Events | Streaming notifications to AI agents |
| Testing | JUnit 5, TestContainers, WireMock | Comprehensive test coverage |
The architecture implements a multi-transport MCP server that handles both traditional HTTP requests and real-time streaming via Server-Sent Events. This enables AI agents to receive immediate notifications during long-running operations like batch processing.
The server supports multiple transport protocols (HTTP, Streamable HTTP) while maintaining a unified business logic layer, making it flexible for different integration scenarios. For more details on MCP transport protocols, see the official MCP specification.
The implementation starts with a comprehensive OpenAPI specification that defines the complete MCP protocol including JSON-RPC 2.0 message structures, tool definitions, and domain models.
The schema components follow the MCP specification schema for JSON-RPC 2.0 message structures:
JSONRPCRequest:
  type: object
  required:
    - jsonrpc
    - method
    - id
  properties:
    jsonrpc:
      type: string
      enum: ["2.0"]
    method:
      type: string
      enum:
        - initialize
        - tools/list
        - tools/call
        - resources/list
        - resources/read
    params:
      type: object
    id:
      type: string
Generating Java classes using the Contract-First approach
<plugin>
  <groupId>org.openapitools</groupId>
  <artifactId>openapi-generator-maven-plugin</artifactId>
  <version>${openapi-generator-maven-plugin.version}</version>
  <executions>
    <execution>
      <id>generate-mcp-sources-api</id>
      <goals>
        <goal>generate</goal>
      </goals>
      <configuration>
        <output>${project.build.directory}/generated-sources/openapi</output>
        <inputSpec>${project.basedir}/src/main/resources/mcp/order-mcp-api.yaml</inputSpec>
        <generatorName>spring</generatorName>
        <generateApis>false</generateApis>
        <modelPackage>com.mycompany.model.api.mcp</modelPackage>
        <configOptions>
          <useBeanValidation>true</useBeanValidation>
          <useSpringBoot3>true</useSpringBoot3>
        </configOptions>
      </configuration>
    </execution>
  </executions>
</plugin>
The main HTTP endpoint uses Camel's Netty-HTTP component to handle incoming requests with support for streaming responses.
@Override
public void configure() throws Exception {
    // Main HTTP endpoint for MCP JSON-RPC requests
    from("netty-http:http://0.0.0.0:{{mcp.server.port}}/camelbee-mcp/rpc")
        .routeId("mcpListenerRoute")
        .to("direct:mcpRpcMain");

    // Main request processing pipeline
    from("direct:mcpRpcMain")
        .id("mcpRpcMainRoute")
        .process(this::enableSeeConnection)  // Enable SSE if requested
        .doTry()
            .unmarshal().json(JsonLibrary.Jackson, JSONRPCRequest.class)
            .setProperty("originalJSONRPCRequest", body())
            .to("bean-validator://camelbee")
            .choice()
                .when(simple("${body.getMethod().value()} == 'tools/call'"))
                    .to("direct:mcpToolCall")
                .when(simple("${body.getMethod().value()} == 'tools/list'"))
                    .to("direct:mcpToolsList")
            .endChoice()
        .marshal().json()
        .endDoTry();
The NettyStreamableHttpService provides real-time notifications during long-running operations.
private void enableSeeConnection(Exchange exchange) {
    String acceptHeader = exchange.getIn().getHeader(HttpHeaders.ACCEPT, String.class);
    boolean sseRequested = acceptHeader != null && acceptHeader.contains("text/event-stream");

    if (sseRequested) {
        ChannelHandlerContext ctx = exchange.getIn()
            .getHeader("CamelNettyChannelHandlerContext", ChannelHandlerContext.class);

        if (ctx != null) {
            String requestId = exchange.getExchangeId();
            exchange.setProperty("requestId", requestId);
            exchange.setProperty("sseEnabled", true);
            exchange.setProperty("nettyChannel", ctx.channel());
        }
    }
}
The server implements comprehensive order management tools that AI agents can discover and execute.
from("direct:mcpToolCall")
    .id("mcpToolCallRoute")
    .errorHandler(noErrorHandler())
    .to("bean-validator://camelbee")
    .choice()
        .when(simple("${body.getParams()['name']} == 'create_order'"))
            .to("direct:mcpCreateOrder")
        .when(simple("${body.getParams()['name']} == 'list_orders'"))
            .to("direct:mcpListOrders")
        .otherwise()
            .throwException(new RuntimeException("Unsupported tool name"))
    .endChoice();
OpenAPI specifications ensure type safety, automatic validation, and consistent API documentation across the entire development lifecycle.
SSE integration provides immediate feedback during long-running operations, essential for AI agent interactions.
Apache Camel provides robust connectivity to databases, message queues, and external APIs with built-in error handling.
Full MCP specification implementation with JSON-RPC 2.0 support ensures compatibility with AI development frameworks.
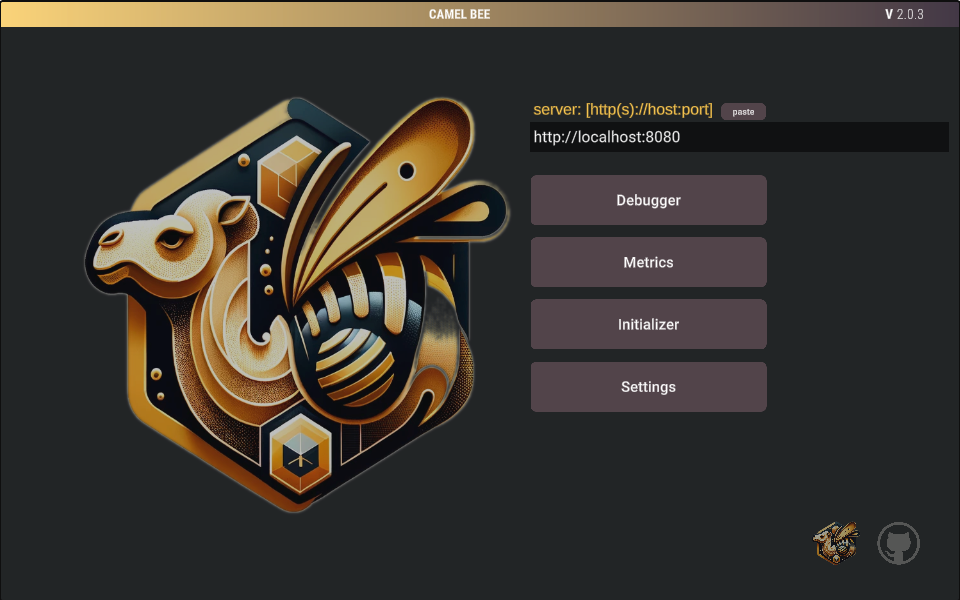
In the CamelBee.io WebGL application select 'Initializer' to scaffold your microservice: Try CamelBee WebGL Application
Define your project parameters (Spring Boot / Quarkus, backend type, interface options).
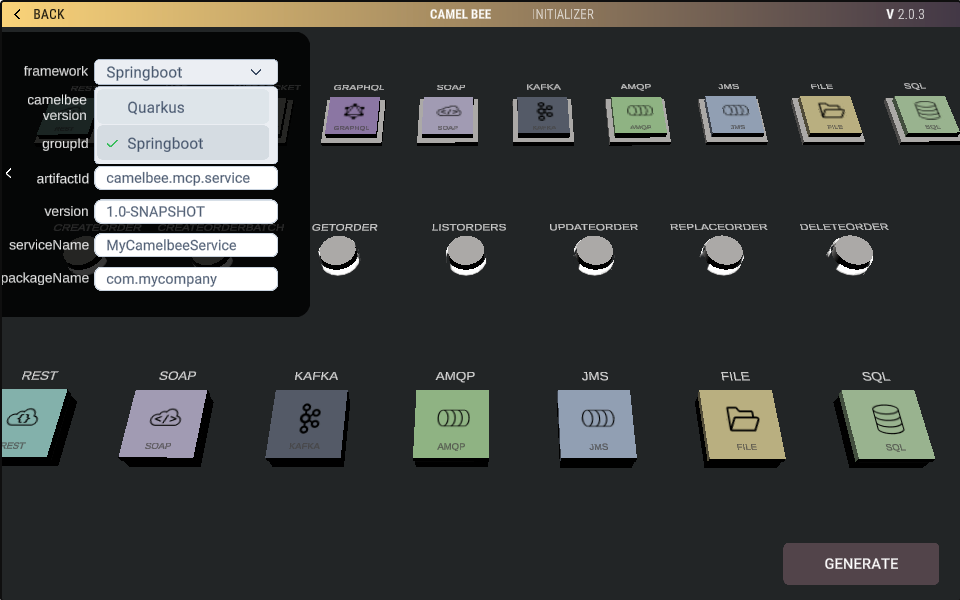
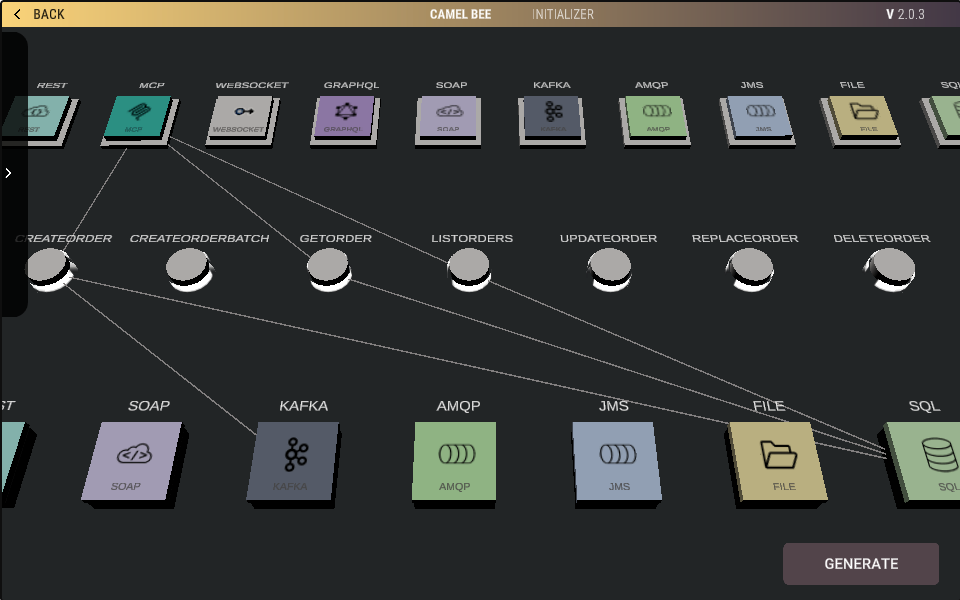
Pick MCP interface and operations and backends for your microservice. Select the appropriate connectors and tools for your use case:
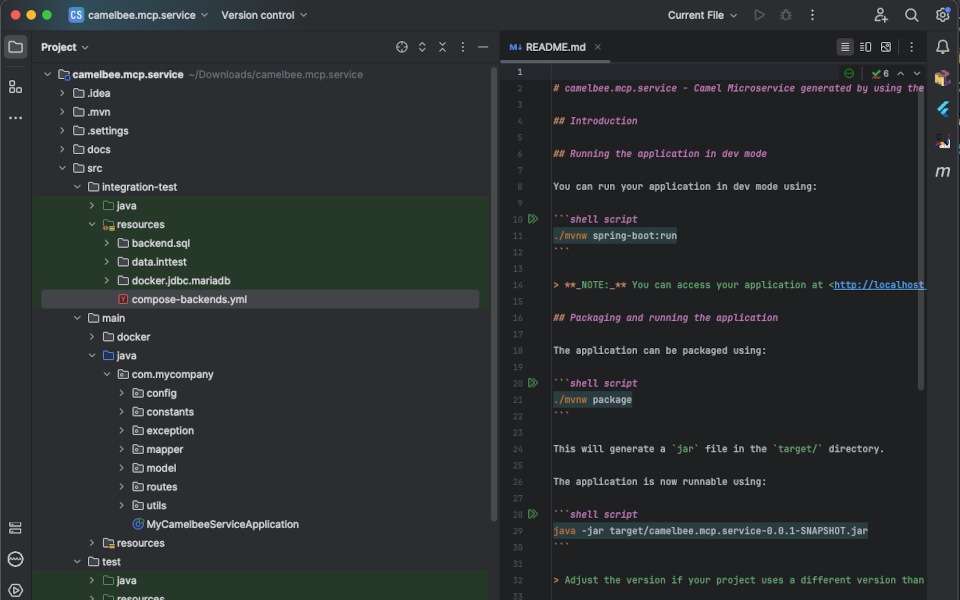
Export your generated project as a Maven build and run it locally. The generated project includes all necessary MCP protocol implementations and test suites.
First build your project:
mvn clean compile
Start the backend services using Docker Compose:
cd src/integration-test/resources
docker-compose -f compose-backends.yml up -d
Then run your microservice:
mvn spring-boot:run
The implementation includes comprehensive integration tests using a custom Netty-based streaming HTTP client that can handle both regular HTTP responses and Server-Sent Events.
@Test
void given_ValidOrder_When_CreateOrderRouteCalled_Then_ResultIsSuccess() throws Exception {
    setupCreateOrderSuccessScenario(fileName);

    List<String> messages = new ArrayList<>();
    List<SSEEvent> events = new ArrayList<>();

    // Use custom streaming client for testing
    client.connectWithCallback(HttpMethod.POST, requestBody, headers,
        message -> messages.add(message),  // Final response handler
        event -> events.add(event),        // SSE event handler
        (error, cause) -> System.err.println("Error: " + error)
    );

    await().atMost(Duration.ofSeconds(15)).untilAsserted(() -> {
        assertThat(messages).hasSize(1);
        validateMcpOrder(messages.get(0));
    });
}
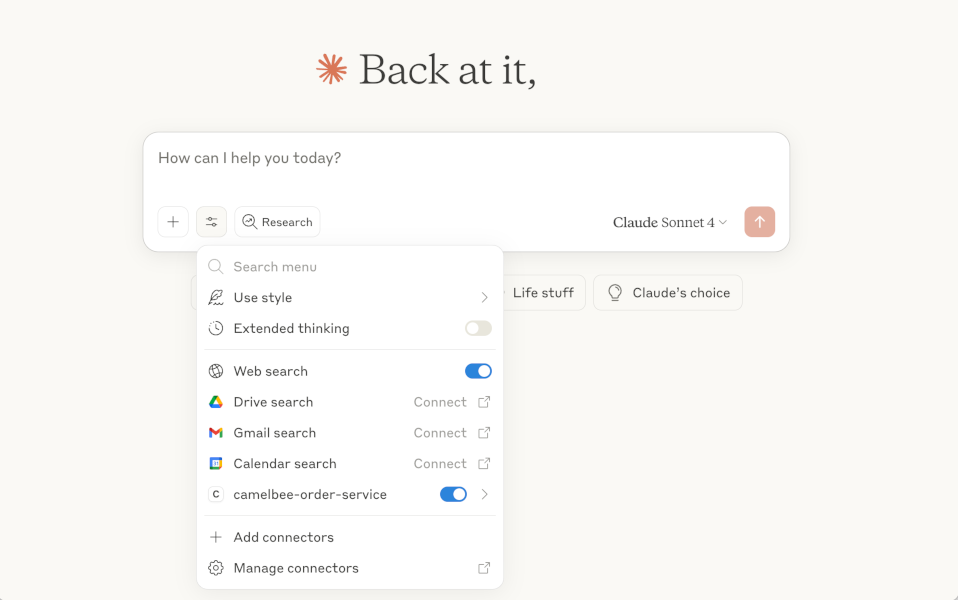
Once your MCP server is running, you can integrate it with Claude Desktop to enable AI-powered order management. Add your CamelBee MCP server to the claude_desktop_config.json file.
The claude_desktop_config.json file is located in different places depending on your operating system:
macOS:
~/Library/Application Support/Claude/claude_desktop_config.json

Windows:
%APPDATA%\Claude\claude_desktop_config.json

Linux:
~/.config/Claude/claude_desktop_config.json
If the file doesn't exist, create it using these commands:
macOS:
mkdir -p ~/Library/Application\ Support/Claude
touch ~/Library/Application\ Support/Claude/claude_desktop_config.json

Linux:
mkdir -p ~/.config/Claude
touch ~/.config/Claude/claude_desktop_config.json

Windows (Command Prompt):
mkdir %APPDATA%\Claude
notepad %APPDATA%\Claude\claude_desktop_config.json
Add the following configuration to your claude_desktop_config.json file:
{
  "mcpServers": {
    "camelbee-order-service": {
      "command": "npx",
      "args": ["@pyroprompts/mcp-stdio-to-streamable-http-adapter"],
      "env": {
        "URI": "http://localhost:8199/camelbee-mcp/rpc",
        "MCP_NAME": "camelbee-order-service"
      }
    }
  }
}
Open Claude Desktop → You can see that camelbee-order-service is added in the tools list.
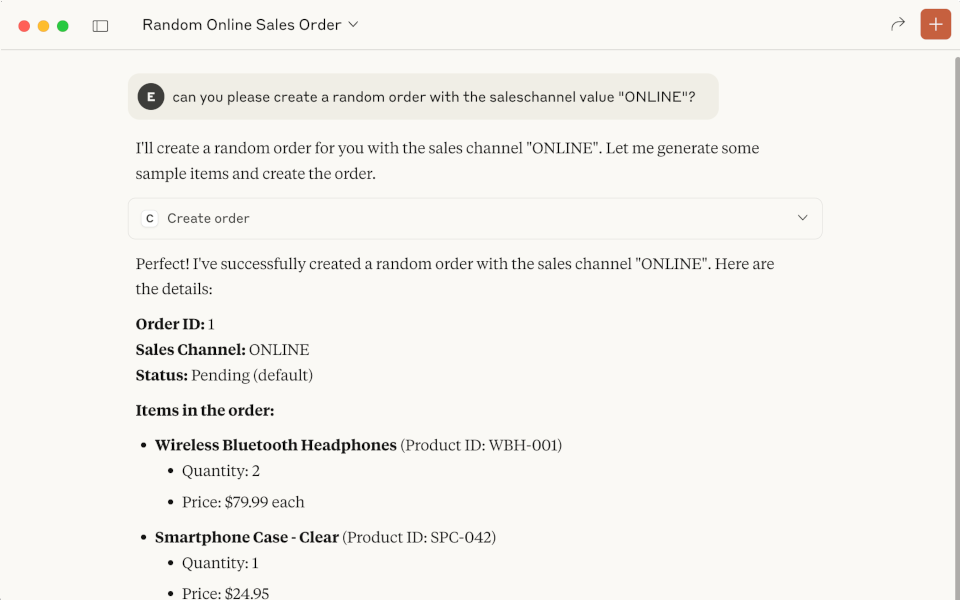
Claude will call your MCP Order Service to create a new order using natural language commands like "Can you please create a random order with the saleschannel value "ONLINE"?"
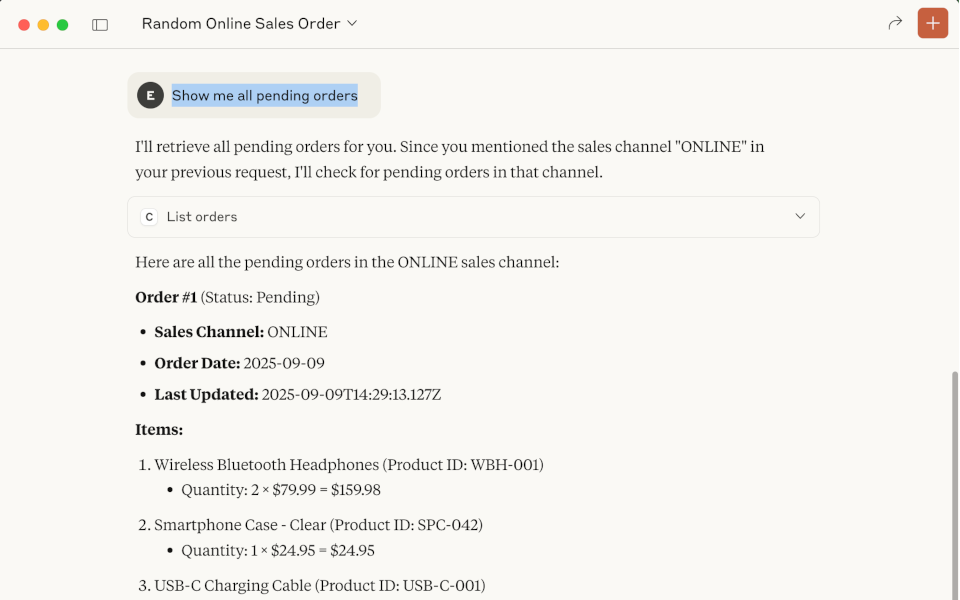
Query existing orders with commands like "Show me all pending orders". Claude will use the list_orders tool automatically.
MCP Protocol Support:
Order Management Tools:
Enterprise Features:
Testing Infrastructure:
While Claude Desktop is calling your microservice, you can debug it in real-time using CamelBee's monitoring capabilities.
Open the CamelBee WebGL application. Enter "http://localhost:8080" for the server and press "Debugger" to start monitoring:

Enable tracing and then ask Claude to perform operations on your MCP server. You can monitor all incoming and outgoing data in real-time:

This implementation demonstrates how to build a comprehensive MCP server using proven enterprise technologies while maintaining full compliance with the MCP specification. The combination of Apache Camel's integration capabilities, contract-first development, and real-time streaming makes it an ideal foundation for AI-driven applications.
By leveraging CamelBee's code generation capabilities, you can quickly scaffold similar microservices and integrate them with AI tools like Claude Desktop, enabling powerful natural language interfaces to your business logic.